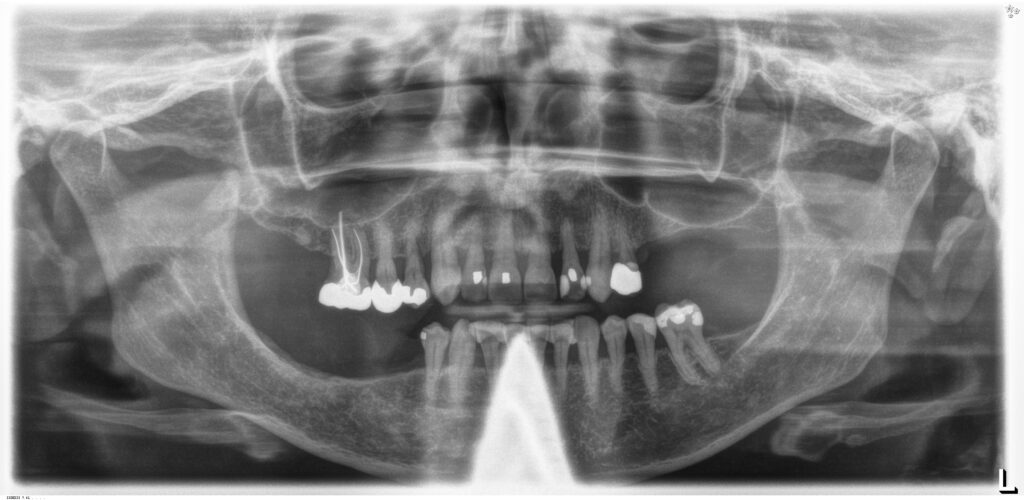
The funny thing about placing implants in your own private practice is there will be a large subset of patients who implicitly trust YOU as their dentist to place the implants. They know full-well you have not yet taking the necessary continuing education to surgically place implants, but they’re willing to wait for you! I had just that type of patients. Mary was a 62 year old retiree who had been missing teeth #29-30 for several years and I had offered to refer her to my periodontist twice already. Once I told her I was investing in a course to place implants myself she said she would love to be my first! What terrifying trust and responsibility that is!
What should that first case be?
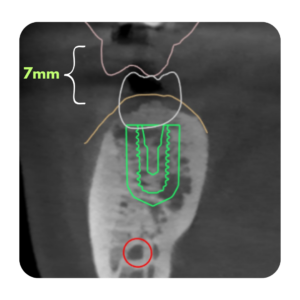
If you have the chance to pick your first case (and you ideally should have some lined up prior to matriculating from whatever course your decided to take) there is nothing better than a healed premolar/molar site with great height, width, and length of bone! Choosing healthy patients to start is also a great way to filter patients to make sure you have the highest success possible. Avoid smokers, diabetics, and maybe even avoid patients who are allergic to penicillin! Mary’s ridge for #29-30 was perfect. Wide, thick keratinized tissue with relatively flat bone and little horizontal or vertical defects. The IAN canal was more than 10mm away from the crest in the posterior mandible, and teeth #3-4 had yet to supra-erupt to a level where occlusion would be a concern.
The Surgical Appointment
[mepr-show if=”loggedout”]

Already a Study Club member? Login
[/mepr-show]
[mepr-show if=”loggedin”]What may have been the most nervousness I’ve ever felt arrived on the morning of the Tuesday directly after the weekend course I took with my assistant. It was time to jump into the frying pan! I had elected to use 11mm length for #29 and a 8mm length for #30. It was planned for a 5.0mm diameter fixture, though after starting the surgery I elected to place 4.3mm widths. Why? Because I got nervous, I got gun-shy, and I lost confidence. It happens. The first ten implants I placed I undersized both width and length from what I had originally planned because I got too nervous during the surgery. Remember the fundamentals and don’t let the nerves of the day replace what you KNOW is the right decision.
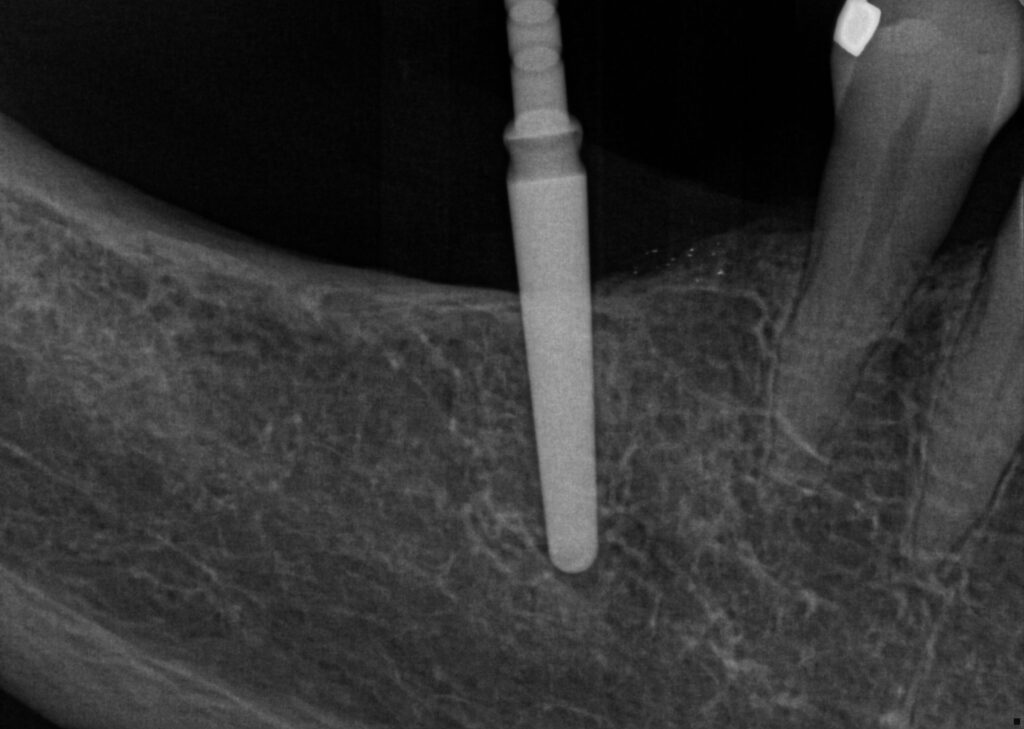
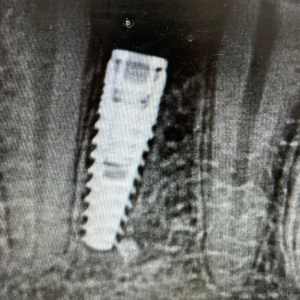
I drilled my pilot 2.0mm drills and took radiographs to check the angles. What do you notice about this first PA?
Common mistakes for beginning placers
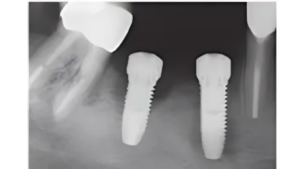
I was so concerned about being too close to #28 that I over-compensated by more than 5mm! Ending with your implants ~2mm from the root of the adjacent tooth sounds great in theory and during lecture, but 2mm is NOT a lot of space! So in the mouth I overcompensated and started way too far away from the tooth.
Also notice the angle? I see this all the time now when I’m mentoring student surgeons. Posterior implants with no teeth behind the surgical site it is really common to see this distally tipped implant angulation. It’s likely due to the pivoting on the teeth and bending the wrist, something we do all day when drilling for direct restorations, but it’s not appropriate for implant surgeries! The entire wrist-forearm-elbow needs to be locked like a drill press. Can you use a stabilizing finger rest? Certainly! But it can not become a pivot point or you get this!
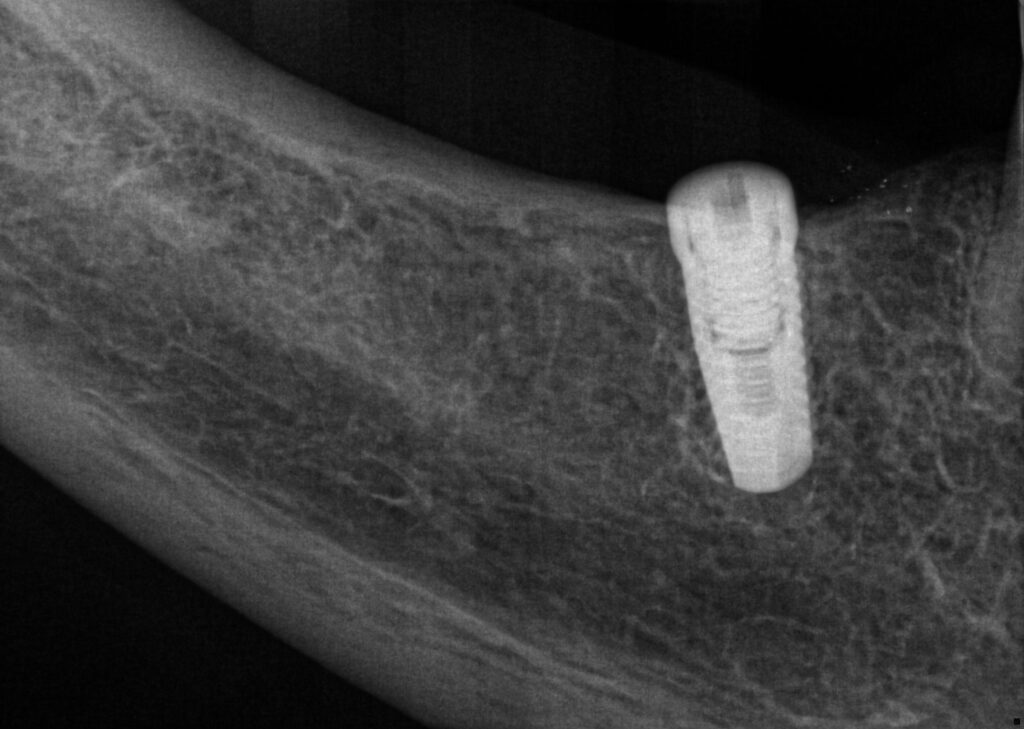
Now take a look at the final PA and see what happened!
The Lindemann Drill
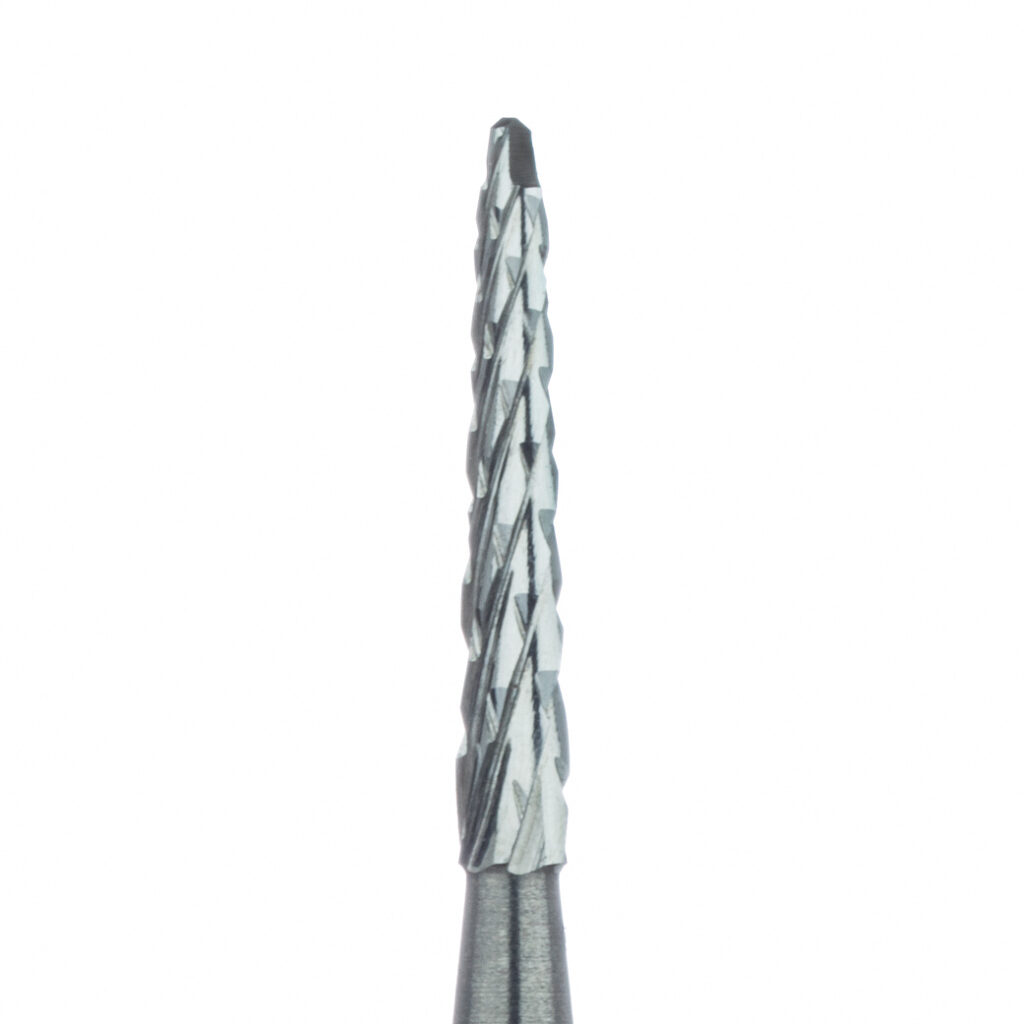
When I took my first course I had never heard of the Lindemann drill. The Lindemann drill is a side cutting 2.0mm drill that is the ideal and perfect way to re-angulate after your initial pilot. It would have been the correct choice to correct the angulation. Instead I moved forward with placement and was locked into the angulation from the first drill, still angled too far distal and too far from #28. See the blown up picture below of the cutting flutes of an Lindemann drill.
Flap Design and Tissue Management
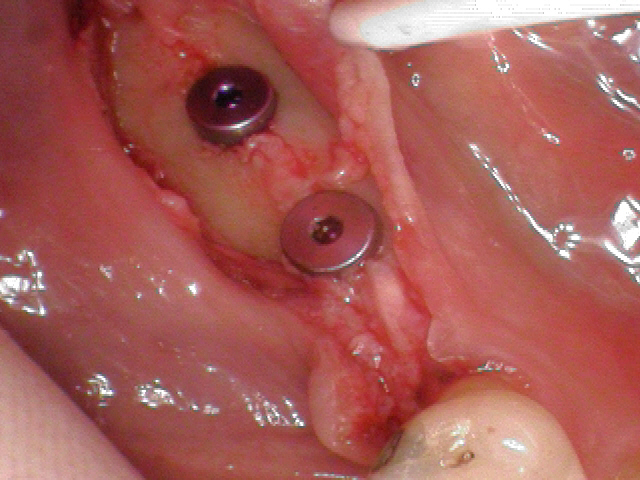
One thing that the vast majority of weekend courses do not have time to touch on is patient tissue management. Flap management and incision design are super important aspects to dental implant surgery, and a poor incision or flap management can spoil an otherwise great surgery. In my first implant case I did not make full thickness incisions, you can see the tissue band of periosteum still attached to the middle of the ridge in this photo.
Final thoughts
Was there a lot to learn from this case? Most definitely! Did I learn all those lessons immediately? Heck no! For years after this placement I would occasionally review these photos and radiographs and find more things I could have done better. You don’t know what you don’t know! I encourage all beginning and more established surgeons to document their cases so they can become informed learners from their own surgeries! And every month, year, decade that you are placing implants you can look back at older surgeries and learn NEW lessons thanks to your increased experience and technique refinement.
Practice Your Passion!
Steven Vorholt DDS DAOBI
P.S. Both implants integrated and healed with no complications and were later restored with crowns to replace #30 and #31. #29 was left as a diastema/gap due to the poor mesial-distal positioning of the implants. But the patient was very happy, and so am I for her and all my patients implicit trust that I will do my best treatment I can possibly accomplish and continue to improve year over year![/mepr-show]

Responses