Soooooooo you’re at the point where you have to get in there an see what’s under the hood…

Yup, I can sympathize with you. If it’s your patient, you might not be feeling too nervous about it.
But if it’s not your patient and not your implant, you might be feeling a bit more apprehensive–And rightfully so!
Have no fear! Let’s break it down.
Step 1: Inform
When it comes to accessing, THERE ARE NO GUARANTEES!
“But why doctor, don’t you know what you’re doing?”
If only the world worked that way. The truth is that accessing an implant crown can be a walk in the park and actually, that’s usually the case!
But it can also be the case that the crown gets damaged during the process so you should always inform the patient that there is always the risk of damaging the crown or it’s components.
Also, if you’re accessing another doctor’s crown, it is possible that this takes you 15 minutes or this takes you 2 hours. If all goes according to plan, you’ll be in and out in no time. If you run into complications, this can go on for a long time. Once, I even had to bail out and not follow through with accessing the crown! So, for that reason, for patients whom you did not do the original implant work, you might want to consider charging them an hourly exploratory fee. Say $800/per hour for the actual appointment in which you access the implant.
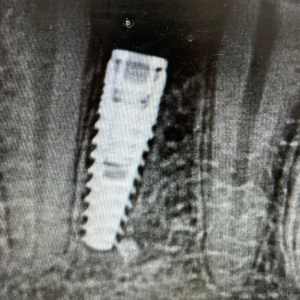
Step 2: Plan
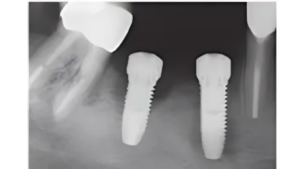
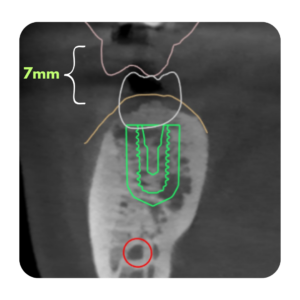
Before you jump in and start cutting like a maniac, take a look at the x ray to see where the implant is. Don’t be afraid of taking new films. A bitewing and a PA can go a long way in helping you guesstimate the possible location of the access hole hidden underneath.
Also, dive into those notes! 📝Find as much as you can about that implant! What type is it, what prosthetic connection are you working with? Is this some 30 year old implant that is basically not on the market anymore?
If you get a chance, hop on the phone with the surgeon who placed it.📞
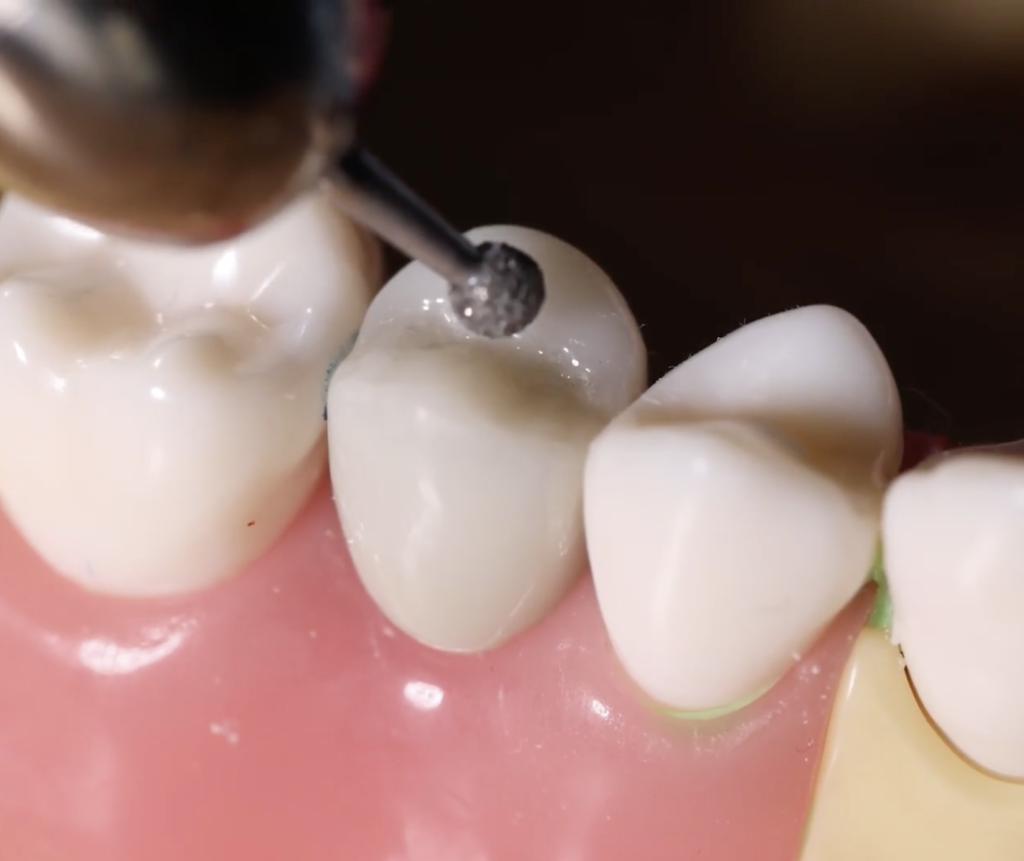
Step 3: Access that sucker
Now, you’re going to have to take a bur to it. A round diamond bur should do the trick. Think of it as an endo access.
You remember those, right?
Just start where you think the middle of the access is, and drill straight down. Your first task is to gently cut through the implant crown.
Then, you’ll start to drill away the cement layer. And finally, you should be getting close to either the titanium abutment or the cotton pellet or teflon underneath.
At some point you will be deep enough that you have to switch to a straight crown prep bur so that you will be able to side cut without causing undercuts. The undercuts impair your vision.
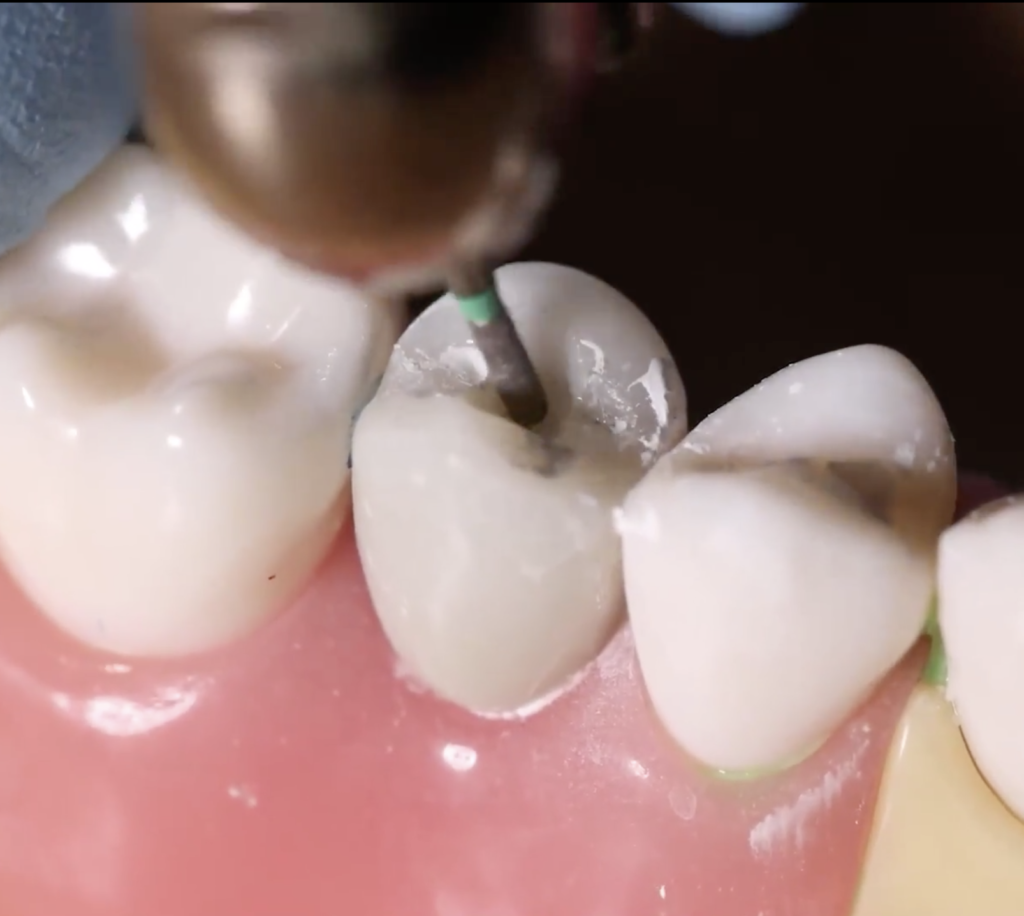
Step 4: Remove stuff
Once you have successfully visualized the cotton pellet or teflon tape which was plugging your access hole, you’ll have to pluck it out! I like to start with an explorer and this does the trick about 50% of the time.
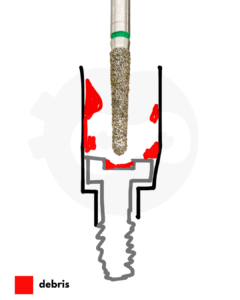
The other 50% I have to keep cleaning up and lightly drilling debris and cement out with my bur. For difficult to remove cotton pellets, you can use a barbed broach (for endo) by inserting them and twisting. This helps catch things that are in the access hole.

Step 5: Keep Removing Stuff & FineTune
You’ll likely have to keep fine-tuning and removing debris. I usually alternate between lightly drilling, lightly scraping with the explorer, and blasting the access with air/water (be carful about the splashback into your face!)
Remember, your mission is to drill, scrape, pluck all of the debris from the channel so that you can clear the way for your implant driver. It’s a small space to work in, but if you can drop a box for a filling, you can certainly do this!
Be sure that you can visualize the screw and that you can get your headlight shining directly into the access. You want very clear visualization!
Step 6: Insert your driver
This is one of the biggest differences in accessing your own and accessing someone else’s implants. If you placed it, you have the right drivers. If you didn’t place it, I hope you said a little prayer.
Now is the time to try out a few different drivers to see which one fits. Don’t FORCE it! The last thing you want is to strip the screw. Then you’d have a much more complicated situation to work with. This is where doing homework ahead of time pays off. But if you didn’t you might still be okay.
Try out the different drivers you have. If your drivers don’t work, you night be able to tell which prosthetic driver design is on the screw. If so, you can order that one! In general, there are basically a few different driver types that would most likely cover it. But that’s a topic for another post!

Video References:
In this video we walk through the entire accessing process:
And here we go over some of the finer points of clearing out the access holes:
Okay, that should about cover it! Now, Godspeed!
Best,
Implant Ninja
PS: If you want more support and community for your implant journey, I invite you to join our Study Club and check out our courses. Cheers!
Responses
…And hope the previous doc put some type of material above the screw head other than just straight composite????????????